
9 Rules to Save Your Joints
Print
Sore, painful joints are almost a by-product of long-term bodybuilding training. Here are the important training adjustments you’ll want to consider if you have joint or connective-tissue pain—or want to avoid it!
While it’s true that death and taxes are the only certainties in life, if you’re a bodybuilder, there’s another: sore joints. The human body has changed rather slowly over the millennia, but the activity of repetitively lifting heavy weights is relatively recent and taxes the body in ways that weren’t originally intended via natural selection or evolution. Pushing our bodies will, sooner or later, take its toll on joints, whether that’s in the shoulders, knees, elbows, or hips, and the connective tissues that attach muscles to bones or bones to other bones. Often, that’s your first introduction to the -itisfamily—tendonitis, bursitis, arthritis—or worse.
The result is pain, and here we’re differentiating this from the “good pain” that comes from a hard workout. Although over-the-counter medications can help, their use can often mask an underlying problem and contribute to further damage without you even knowing it—until the medicine wears off. If you’re trying to cover up pain to make it through your training sessions, it’s long past time to see a sports-medicine doctor.
In the meantime, consider making these nine accommodations to your workouts that relieve joint pain, which are especially important if you’re an older athlete or currently suffering from some type of joint pain. Even if you’re not experiencing pain now, following these guidelines can help keep you in the gym rather than sidelined with an injury.
1. Avoid exercises that hurt.
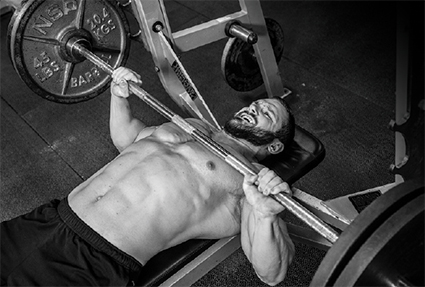
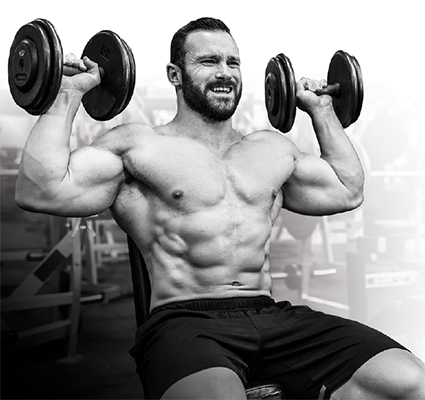
 As stubborn as some of us are to try to work througha degree of pain, a better approach is simply to try and do the same movement pattern that hurts with alternative pieces of equipment. Lots of us have pain doing barbell bench presses, for example, that seemingly disappears when the same motion is done with dumbbells. The dumbbells in fact allow greater freedom of movement in the shoulder joint whereas a barbell may force you into an uncomfortable, restrictive position. You can also slightly alter the range of motion and movement arc to make the necessary accommodations. Go by how it feels.
Another option: Try single-joint movements that reduce the contribution from the affected joint. Flyes and cable crossovers require locking the elbow joints in partially bent position at the expense of reducing the load, but you can still achieve significant pectoral activation. The bottom line is that you want to be training in a pain-free range of motion, so start by exploring exercise substitutions.
2. Always use a smooth, controlled motion and never bounce out of the bottom of a rep.
 Reducing your rep speed is a simple way to take pressure off joints. Any time you’re slowing down a movement, you’re actually putting more stress on the muscle and taking it off the joint itself. Heavy weights, by their nature, use a slower rep speed, so this is an especially important point when you’re training with lighter to moderate weights.
Controlling movements puts the stress on the muscle, which is what you want because it improves hypertrophy. It also reduces momentum, which is how you often incur an injury. Bouncing, momentum, and cheating are all ways to allow you to use more weight than you should with strict form, and all those can aggravate a sore joint. Poor form invites contributions from other muscle groups that aren’t normally called into play, as well as associated joints, ligaments, and tendons. But by reducing the load, working on your technique, and using a smooth motion, you can ensure only the target muscles and the joints they attach to are targeted.
3. Machines may (or may not) aggravate sore joints.
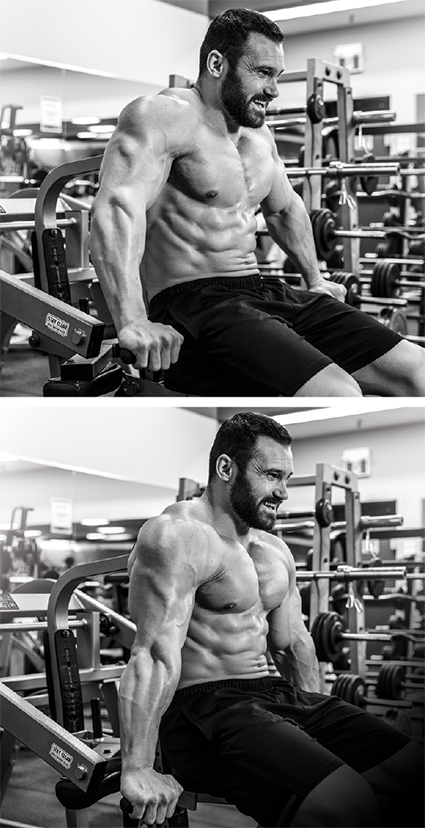 When it comes to machines, the first and most important consideration is getting them set up for your body dimensions. Several adjustments typically need to be made in advance to ensure it fits you—and not the person who used it just before you.
After getting them set up properly, machines can then either help or hinder, depending on personal factors. Beginners, who typically struggle with balance, may find a machine helpful by controlling the movement path, whereas an advanced lifter might determine the apparatus’ fixed range of motion similar to that of a barbell, forcing the joints into a position they don’t like. In that sense, you really have to determine for yourself whether a given machine is beneficial, and remember, you may find different outcomes for different manufacturers of the same machine type.
4. Do a more extensive warm-up.
 By their nature, warm-ups gradually loosen up both muscles and connective tissues, improving your range of motion and flexibility, and preparing you for heavier loads. The increased blood flow also helps increase neural activation, allowing for more muscle fibres to fire during a lift.
Typically, a five- to 10-minute cardio warm-up gets your heart rate elevated, which should be done in addition to some very light warm-up sets of your initial movement. While static stretching isn’t typically recommended before your training session, dynamic exercises can be beneficial. Think high kicks, knees to chest, lunges with a twist, and similar body-weight movements.
5. Avoid training to failure.
 Think about it: When you’re training to failure, you’re at the point in which you can’t achieve another rep with good form. But by that point small breakdowns have already started to occur. Stopping short of failure, then, allows you to avoid this tipping point in form.
If you’re using a fairly heavy load and you’re at failure, that can add even more pressure on a sore joint. If you’re looking to build muscle within the 6- to 12-rep range, why not consider opting for a slightly lighter weight and training at the higher end of the target rep range? You’ll still keep the muscle under tension the entire time and be better capable of using a slow and controlled motion with better technique, feeling the muscle work. That’s a good strategy, at least for some of your workouts.
6. Skip (or limit) the intensity-boosting techniques.
 Backing off training to failure also means backing off post-failure techniques. While bodybuilders often have an all-go/all-the-time mind-set, it’s especially counterproductive for joint health. Cycling heavy and lighter periods of training and including periods of active recovery that aren’t as strenuous can be highly beneficial. Alternating heavy, hardcore workouts with lighter, back-off sessions in the sameweek serves a similar purpose.
7. Use pre-exhaust to lighten the load.
 I’ve interviewed many bodybuilders who’ve learned to use this one effectively. Instead of starting their workout with a heavy, multi-joint exercise, which is the common prescription for muscle growth, they flip it, doing a single-joint exercise first instead. So instead of starting with squats, for example, the lifter does multiple working sets on the leg extension first. By pre-fatiguing the quads before going into squats, you’ve limited your ability to handle the same kinds of weights you might otherwise have been able to do. All of a sudden, 275 pounds for reps feels heavy, whereas without the pre-fatigue you might be able to easily handle loads of more than 300. Essentially, it allows you to use a lighter load with your multi-joint exercises, and pushing the initial exercise back a position or two may in fact serve to allow for a longer, more comprehensive warm-up.
8. Stop short of locking out.
Conventional wisdom is to take a movement to full extension—that is, to the end of the range of motion. But when you lock out a joint, most often done with multi-joint chest, shoulder, triceps, and leg exercises, the load instead can primarily shift to the joint itself.
In this case, the muscle itself can become unloaded. That occurs when you achieve maximum surface contact between the two adjoining bones, which is especially unwise if, say, you have 500 to 1,000 pounds on the leg press. That also affects time under tension, meaning it can even cost you muscle gains.
In the case of reducing maximal surface contact, what’s important is the last 10 degrees or so in the range of motion on the extension; with the leg press, it could be problematic because it can mean grinding away at the patella. Whether you’re doing a squat, hack squat, or leg press, stop short of the end point to ensure the stress stays on the muscles.
9. Don’t boost training intensity too fast.
 If you normally train in a 6- to 12-rep range, suddenly going for a max can mean an extra 50 to 75 pounds on the bar. That’s a pretty big increase in force all of a sudden that’s put on not just on your musculature but connective tissue as well. Don’t forget, tendons and ligaments grow more slowly than muscle tissue and can quickly become a weak link in a chain, putting you at greater risk of injury.
Ultimately, if you’re cycling training stages, make changes in your workouts moderatelyrather than all of a sudden. Allowing your body to adapt from using 10RM to 8RM to 6RM loads can take time and should be done gradually. As you become accustomed to the heavier loads, you can make further changes as necessary.
Get articles like this one delivered to your email each month by signing up for Muscle Insider’s mailing list. Just click here.